

In this guide, you will create a complete server side rendeard (SSR) authentication system using estro, soup base, and cloud flair turn styling to protect from bots.
Finally, you will have a fully functional verification system that will verify the magic link using a magical link verification, cloud flair turn styles, safe routes and middleware, and safe session management using a magic link using the spectrum, spike base.
The table of content
Provisions
This tutorial assumes that you are aware of it:
To understand the technologies
What is Estro?
Estro Is a UI-AGNOSTIC web framework that offers Server first Default this Can be used with any UI frameworkIncluding Estro client components.
What are Estro actions?
Estro actions Allow you to write server side functions that can be clearly invited without setting API routes. They provide many useful utilities that facilitate the process of operating server logic and can be called both the client and the server environment.
What is the soup base?
Soup twenty Is a service as an open source bacland that builds Postgers. It provides key features such as verification, real -time capabilities, edge functions, storage and more. The soup base offers both the host version for easy scaling and the self -hostel version for full control.
What is Cloud Flair Turn Style?
Turn is styl Alternatives of Cloud Flair for CapachasWhich are visual puzzles that are used to distinguish between real users and boats. Unlike traditional CAPTCHAS, which are visually stabbing, disturbing, and Sometimes it is difficult to solveTurn style users detect malicious activity without need to solve puzzles, while providing better user experience.
Understanding the SSR verification
Server side Radrid (SSR) refers to handling verification on the server using a cookie -based verification method.
Flow works as the following:
The server develops a session and stores the session ID in the client’s cookie
Browser receives cookie and automatically adds it to future requests
Server cookie uses to determine whether the user has been verified
Since the browser cannot only edit the cookies only and the server cannot access local storage, SSR verification is needed to prevent safety risks like session hijacking and stale sessions.
SSR vs Spa Verification
Single page applications (SPAS), such as traditional react apps, handle authentication by the client because they do not have direct access to the server. Spas usually use JWT stored in local storage, cookies, or session storage, when sending these token to HTTP headers when talking to servers.
https://www.youtube.com/watch?v=hde3dk8vkru
Why protect author’s forms?
Verification protects sensitive resources from unauthorized access, which makes the form of writings for boats and malicious actors. Extra precautions are needed to maintain security.
Part 1: The method of setting up the backbone
Sopabees
First, you will need A soup base account. Then make a project, then:
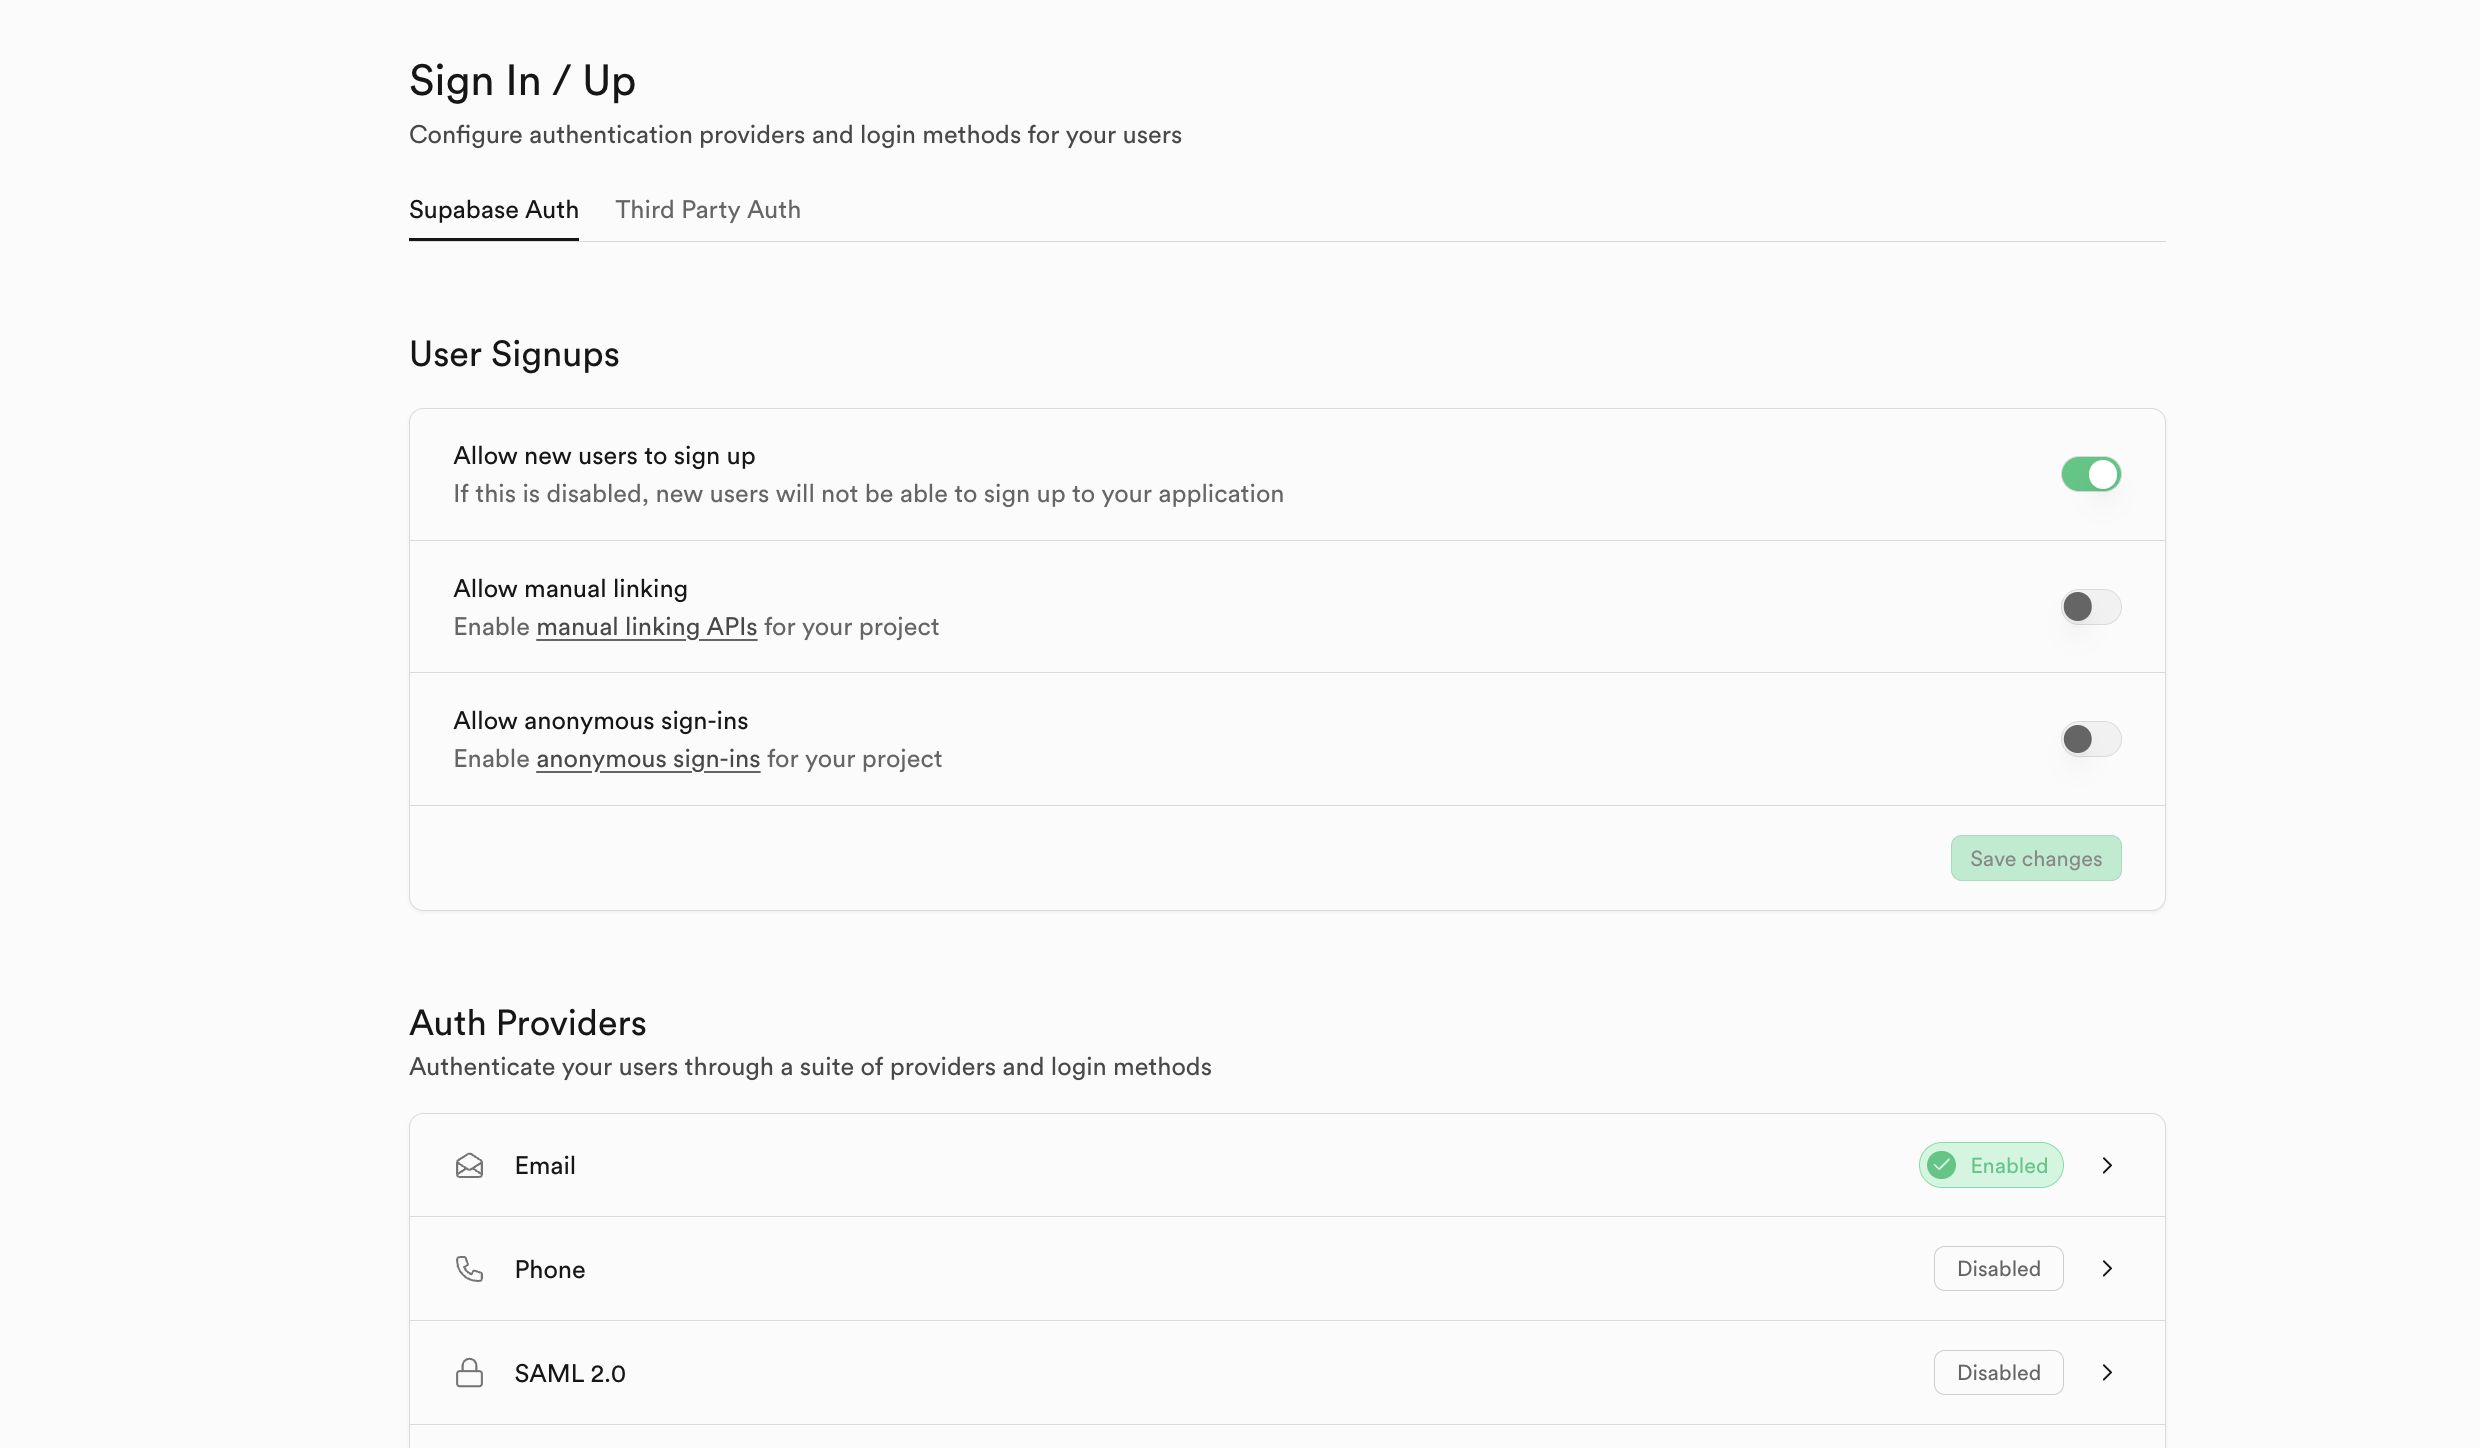
Go to the verification tab in the sidebar
Click on Sign in / Up tab under the configuration
Enable User Sign Up
Scroll down and Enable E -mail (Disable E -mail Confirmation for this tutorial)
Set the Cloud Flair Turn Style
Click on Turn Style Tab in Sidebar
Click the “Add Widget” button
Name your widget and add “Local Host” as a host name
Leave all other settings as default, and make a widget

After making a widget, copy the secret key and add it to your Sopas Dashboard:
Return to supabase confirmation settings
Go to the Auth Protection tab under sequence
Activate CAPTCHA protection
Choose Cloud Flair as a provider
Paste your secret key

Part 2: How to configure Front End
Create Estro Project
Next, you will need to create an estrow project. Open your preferred IDE or text editor’s integrated terminal and run the following command to support the estrow project in a folder called “SSR Out”. Use any name of your choice without hesitation.
npm create astro@latest ssr-auth
Follow the gestures provided and select a basic template to start. When it happens, turn into a folder, then run npm install To install dependent, followed by npm run dev To start the server, and your site will be available localhost:4321.
Create Estro for SSR
Set Estro by adding to SSR mode output: "server", to defineConfig Found in the function astro.config.mjs File on the root of the folder.
Next, Add an adapter To make the server run time. For this, use this command in the terminal and use the node dot JS adapter: npx astro add node. This will increase it and will automatically make all relevant changes.
Finally, add the tail wind for the style. Run this command into the terminal window: npx astro add tailwind. Follow the indications, and it will require any change.
At this stage, you astro.config.mjs Should look like this:
import { defineConfig } from "astro/config";
import node from "@astrojs/node";
import tailwindcss from "@tailwindcss/vite";


export default defineConfig({
  output: "server",
  adapter: node({
    mode: "standalone",
  }),
  vite: {
    plugins: (tailwindcss()),
  },
});
Install the soup base dependent
You can do this by running the following command:
npm install @supabase/supabase-js @supabase/ssr
Create environmental variables
A .env File to the root of the project and add the following. Remember to replace your original credentials:
SUPABASE_URL=
SUPABASE_ANON_KEY=
TURNSTILE_SITE_KEY=
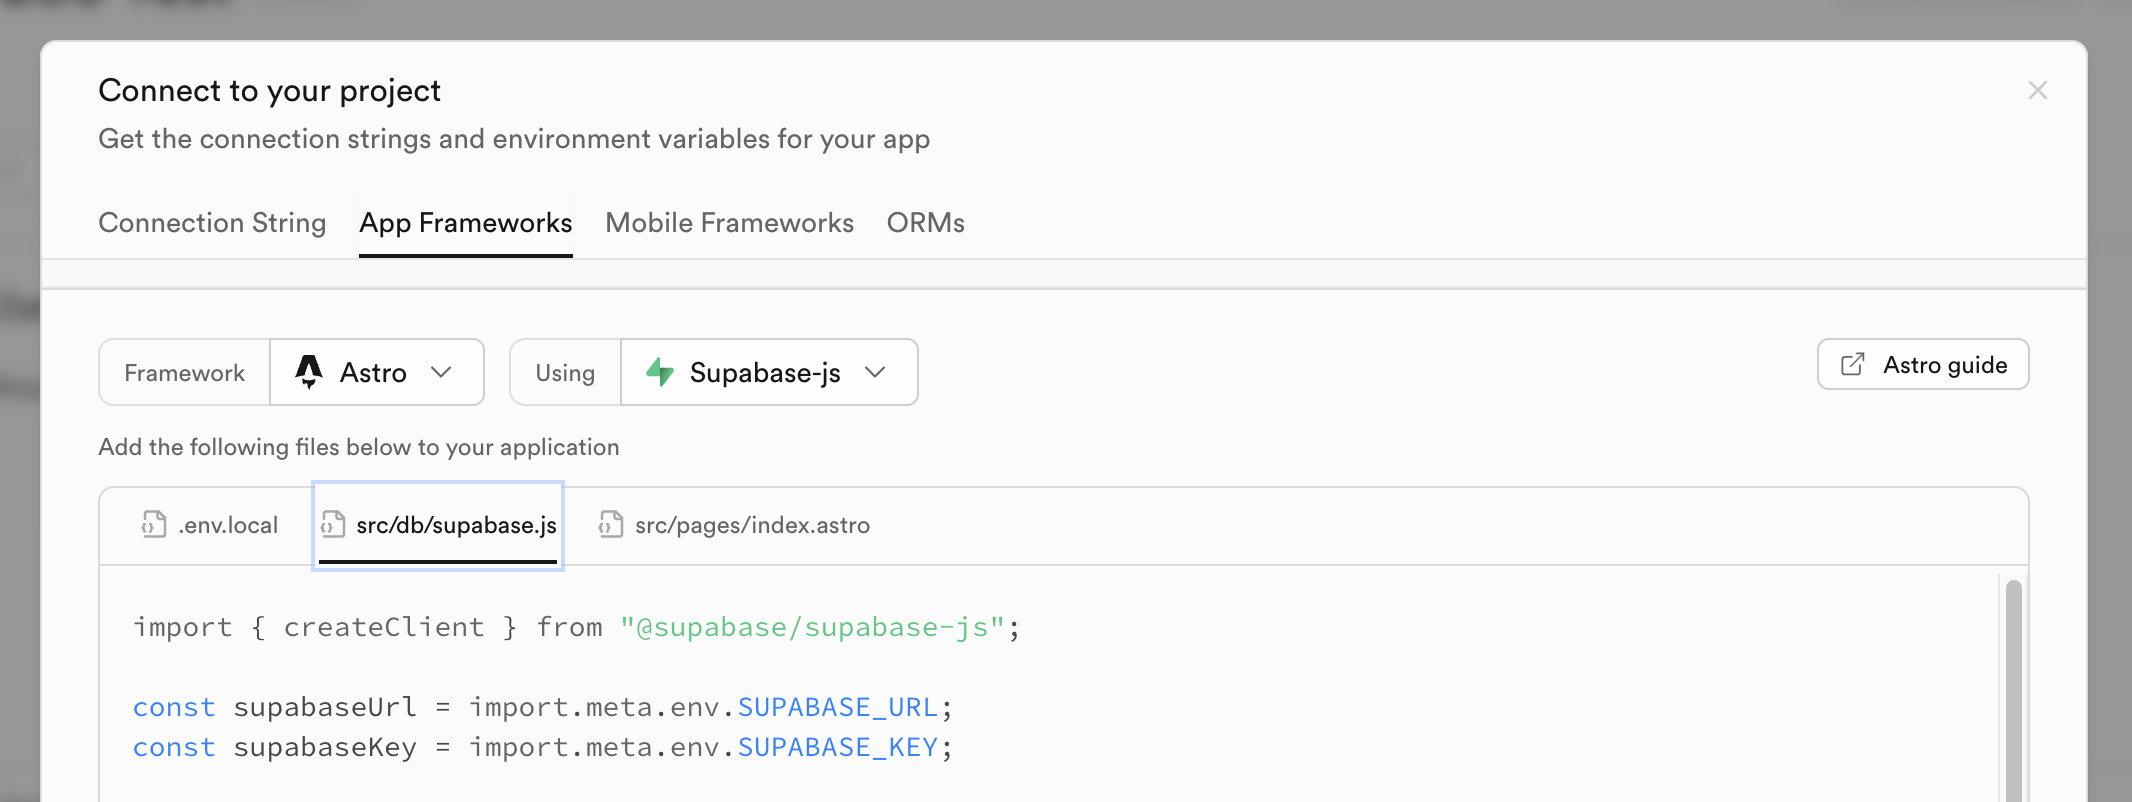
You can get soup base values from the dashboard:
N Note: In Estro, environmental variables should be offered with ‘public’ to access the client’s side. But since we are using the server -runstro actions, it is not needed before.
Part 3: How to configure Sopas SSR
Make soup twenty clients
Create src/lib/supabase.ts:
import { createServerClient, parseCookieHeader } from "@supabase/ssr";
import type { AstroCookies } from "astro";

export function createClient({
    request,
    cookies,
}: {
    request: Request;
    cookies: AstroCookies;
}) {
    const cookieHeader = request.headers.get("Cookie") || "";

    return createServerClient(
        import.meta.env.SUPABASE_URL,
        import.meta.env.SUPABASE_ANON_KEY,
        {
            cookies: {
                getAll() {
                    const cookies = parseCookieHeader(cookieHeader);
                    return cookies.map(({ name, value }) => ({
                        name,
                        value: value ?? "",
                    }));
                },
                setAll(cookiesToSet) {
                    cookiesToSet.forEach(({ name, value, options }) =>
                        cookies.set(name, value, options)
                    );
                },
            },
        }
    );
}
It sets the soup base to handle Cookies in the application offered from the server And exports a function that objected to the application and cookies as input. Function is thus configured because Estro has three ways to access application and cookie information:
Through the World Object, which is only available on the Estro pages.
Through
AstroAPIContextObject, which is only available in estro -actions.Through
APIContextWhich is the world set of the global object and is available through API routes and middleware.
So createClient Accepts the function request And cookies In different contexts, separate items can be used to make it flexible and applicable.
Create Middleware for Route Protection
Next, make a middleware.ts I file src Folders and paste it in:
import { defineMiddleware } from "astro:middleware";
import { createClient } from "./lib/supabase";

export const onRequest = defineMiddleware(async (context, next) => {
    const { pathname } = context.url;

    console.log("Middleware executing for path:", pathname);

    const supabase = createClient({
        request: context.request,
        cookies: context.cookies,
    });

    if (pathname === "/protected") {
        console.log("Checking auth for protected route");

        const { data } = await supabase.auth.getUser();


        if (!data.user) {
            return context.redirect("/");
        }
    }

    return next();
});
When accessing a safe path, this middleware checks for an active user and redirects unverified users to the index page.
Part 4: How to build a user interface
Update Layout
First, refresh src/layouts/Layout.astro To add turn style script. Add it exactly above the closing tag:
Create Sign in Page
Change the contents of src/pages/index.astro:
---
import Layout from "../layouts/Layout.astro";
import { createClient } from "../lib/supabase";
import "../styles/global.css";

const supabase = createClient({
    request: Astro.request,
    cookies: Astro.cookies,
});

const { data } = await supabase.auth.getUser();

if (data.user) {
    return Astro.redirect("/protected");
}

const apiKey = import.meta.env.TURNSTILE_SITE_KEY;
---


    class="flex flex-col items-center justify-center m-30">
Here, the Front meter forms a soup base server client and then uses it to check whether we have an active user or not. This is redirected based on this information. It works because the front case runs towards the server, and the project server is set on the output.
The template shows a simple form with email input. To complete it, add it to the bottom of closing tag:
It has included some vanilla JavaScript that calls SignIn On submitting the form. This process provides user feedback through warnings and manages the text and disability of the button. This effectively increases interactiveness by the client in the page.
Create a reserved page
Create src/pages/protected.astro:
---
import Layout from "../layouts/Layout.astro";
import { createClient } from "../lib/supabase";
import "../styles/global.css";
const supabase = createClient({
request: Astro.request,
cookies: Astro.cookies,
});
const { data } = await supabase.auth.getUser();
---
class="flex flex-col items-center justify-center m-30">
class="mb-6">Your user Id: {data.user?.id}
This page retrieves from the user’s data server in the front case and shows it in the template along with the signout button.
I JavaScript script Tags handle the signout, the user’s feedback, and the button calling the state, as index.astro Page
Part 5: How to compose estro measures
Make verification actions
Finally, add actions I folder src Folder and create index.ts File to prevent our logic. Paste the following in this:
import { defineAction, type ActionAPIContext } from "astro:actions";
import { z } from "astro:schema";
import { createClient } from "../lib/supabase";

const emailSignUp = async (
    {
        email,
        captchaToken,
    }: {
        email: string;
        captchaToken: string;
    },
    context: ActionAPIContext
) => {
    console.log("Sign up action");
    try {
        const supabase = createClient({
            request: context.request,
            cookies: context.cookies,
        });

        const { data, error } = await supabase.auth.signInWithOtp({
            email,
            options: {
                captchaToken,
                emailRedirectTo: "http://localhost:4321/api/exchange",
            },
        });

        if (error) {
            console.error("Sign up error", error);
            return {
                success: false,
                message: error.message,
            };
        } else {
            console.log("Sign up success", data);
            return {
                success: true,
                message: "Successfully logged in",
            };
        }
    } catch (err) {
        console.error("SignUp action other error", err);
        return {
            success: false,
            message: "Unexpected error",
        };
    }
};

export const server = {
    signIn: defineAction({
        accept: "form",
        input: z.object({
            email: z.string().email(),
            captchaToken: z.string(),
        }),
        handler: async (input, context) => {
            return emailSignUp(input, context);
        },
    }),
    signOut: defineAction({
        handler: async (_, context) => {
            const supabase = createClient({
                request: context.request,
                cookies: context.cookies,
            });
            const { error } = await supabase.auth.signOut();
            if (error) {
                console.error("Sign out error", error);
                return {
                    success: false,
                    message: error.message,
                };
            }
            return {
                success: true,
                message: "Successfully signed out",
            };
        },
    }),
};
This action handles both sign -in and signout methods. During the sign in method, a soup base server is created, and the magic link method is used for sign. It passes through a redirect URL, which we now have to make, and handle whatever mistakes can be made.
It also approves token verification, which allows the soup base to be verified by us, and eliminates the need to call. Cloud Flair Confirm APIS Straight
The signout method calls Sopas’s signout method and handles any possible errors.
Redirect URL refers to an API route that exchanges the code with an email that sends the soup base that sends for the session.
Create Code Exchange API Way
Create src/pages/api/exchange.ts:
import type { APIRoute } from "astro";
import { createClient } from "../../lib/supabase";

export const GET: APIRoute = async ({ request, cookies, redirect }) => {
    const url = new URL(request.url);
    const code = url.searchParams.get("code");

    if (!code) {
        return redirect("/");
    }

    const supabase = createClient({ request, cookies });
    const { error } = await supabase.auth.exchangeCodeForSession(code);

    if (error) {
        console.error("Error exchanging code for session:", error);
        return redirect("/404");
    }

    return redirect("/protected");
};
It grabs the code from the URL in the magical link sent, makes the server client, and calls exchangeCodeForSession Procedure with code. It handles any mistake by redirecting to the built -in founder page of Estro.
Otherwise, it will be redirected to the safe page as the soup handles the details of the implementation of the base session.
Part 6: How to test your request
Start your Development Server: npm run dev
Watch the local host URL provided. You should view the sign -in page with the Turn Style Widget:

If you try to access /protected Page, it will send you back to this scene until you sign in. /protected Page It should see you:

And at the same time, you have successfully developed a comprehensive autobiography system that takes advantage of Austro’s actions, soup base, and cloud -flair turn style boot protection. This setup provides a safe, user -friendly verification experience while protecting your application from malicious actors.
Notes and additional resources
Useful documents
Full Code Repeatory
The full code of this project is available on Gut Hub: