

In this article, we will dive into the title of nerve -style transfer in deep learning and we will create a simple NST with the use of piturich.
NST is a technique used in AI to create a new picture from any content and styling pictures. This process allows you to take the contents of the first picture and connect this image with styling image colors, textures, etc. With the help of this system, you can transform any pictures of any kind into artistic style pictures.
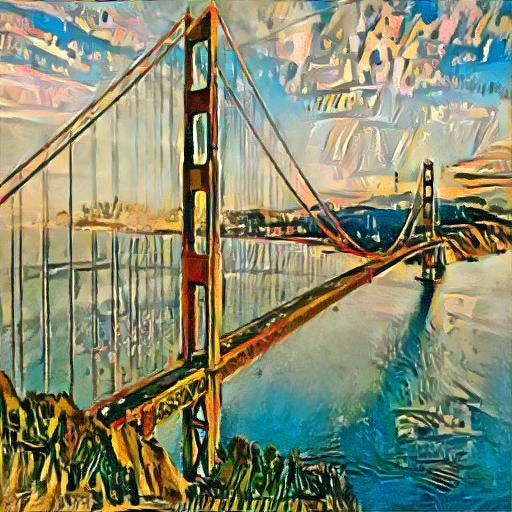
System 2 takes pictures of one of them and the other style is like the following and new photo produced.


How does it work? In technical sense …
- VGG19 Model
First, we use a deep learning system name VGG19. It is a well -trained system in the deep learning area.

VGG19 is made of several conductive layers and Max pool layers. Each one layer image increases local data. Each of the Max pool reduces the image height and weight data. With the help of two techniques, the image pixel data reduction and squeeze 224x224x3 -> 7x7x512 (for the picture) and squeeze.
After polling and confusion layers, image data is fully fully attached to the layers and the soft Max layer or the purpose of the system at all whatever layer.
In the NST, our goal is to change their pixel values rather than learning features or make decisions about input data. That is why we need a little sinking and need to understand our system. Every layer of our system has its own duty. And receives a variety of information. The early layers mostly catch textures, edges (styling good good). The deep layers mostly occupy the object structure (good content of the content).
Therefore, we can use a pre -trained VGG model to make a picture.
2. Gram matrix
The gram matrix can be calculated to find the damage function of our system. In the AI area, we always have some damage work that is minimized to find the proper weight related to our purpose. It can be appreciated like our total loss in NST
Total damage = Content Content Damage+ST STOLD
Alpha and beta are a permanent and design choice. “Material Damage” and “style loss” parameters are parameters that must be calculated every step. We need gram matrix for “style loss” calculation. Almost LY, it has captured the connection between the layers. I do not want to go to equality so that the subject does not turn. You can find them with a little searching in documents, books, Internet sites, etc.
We also need to calculate square error for “material loss”. If we try to reduce this total damage every step, the image we have created changes somewhere between content and style images. This means that it can be created from content and styling photos data.
3. Features
As I said earlier, it is important to calculate the loss of content and the loss of styles of content for each step.
How can we get full damage in every step? In response, we can use layer results as each step features. As I seat before, the early layers mostly capture the styles and most of the contents are occupied in the deep layers. If we can get the results of the layer at each stage, we can use these outputs to calculate the loss of the system.
4. Code
- Print content and styling image and initialization
In the following code, we can load content and styling images and compose usable processors. If GPU can be enabled our computer, the device’s use is converted as GPU.
Loading the image method, set the maximum size as 512 PX and convert image data into tensors to process them. In addition, you can also try to break the image height X width ratio.
Our VGG model requires normal action. These numbers are meaningful and standard deviation in terms of the image channel in the image of the image-which is the VGG19 model (and Patrick used to train many other pre-trained models.
Plot our photos requires the “IM_Convert” method. This tanker transforms data into image data.
import torch
import torch.nn as nn
import torch.optim as optim
from torchvision import models, transforms
from PIL import Image
import matplotlib.pyplot as pltdevice = torch.device("cuda" if torch.cuda.is_available() else "cpu") # Check if GPU is available
print(f"GPU/CPU using: {device}")
def load_image(image_path, max_size=512, shape=None):
image = Image.open(image_path).convert("RGB")
# Resize the image if it's too big
if max(image.size) > max_size:
size = max_size
else:
size = max(image.size)
if shape is not None:
size = shape
# Image resize and normalization to get ready for VGG
transform = transforms.Compose((
transforms.Resize((size, size)),
transforms.ToTensor(), # converts image to (0,1) tensor
transforms.Normalize(mean=(0.485, 0.456, 0.406),
std=(0.229, 0.224, 0.225)) # match VGG preprocessing
))
image = transform(image).unsqueeze(0) # add batch dimension
return image.to(device)
# Tensor to image transformation
def im_convert(tensor):
image = tensor.clone().detach().squeeze(0)
image = image.cpu().numpy().transpose(1, 2, 0)
image = image * (0.229, 0.224, 0.225) + (0.485, 0.456, 0.406) # Unnormalize
return image.clip(0, 1)
content = load_image("content.jpg")
style = load_image("style.jpg", shape=int(content.shape(-2)))
plt.figure(figsize=(10, 5))
plt.subplot(1, 2, 1)
plt.title("Content Image")
plt.imshow(im_convert(content))
plt.subplot(1, 2, 2)
plt.title("Style Image")
plt.imshow(im_convert(style))
plt.show(block=False)
First, we should load the desired pre -trained VGG19 module. Since we do not need to train this model, we must call the Evil method to ensure that our system’s behavior is permanent.
We can also choose any content and styling layers, if you want to see the results, you can change and run the code for different layers.
The “Get_Feature” procedure helps to take the selected features into the model.
We produce a picture created with a picture of our content as the beginning. We can choose the starting losses, set a square error to calculate and minimize the error and set the optimizer. You can also change this term with Adam or SGD or any kind of different correction methods.
# Call pre trained vgg19 model with weights. Close dropout, batch normalization etc. to ensure that system behaviour is consistent
vgg = models.vgg19(weights=models.VGG19_Weights.IMAGENET1K_V1).features.to(device).eval()
for param in vgg.parameters():
param.requires_grad = False # we do not want to traincontent_layers = ('conv4_2')
style_layers = ('conv1_1', 'conv2_1', 'conv3_1', 'conv4_1', 'conv5_1')
# Extract features (layer outputs)
def get_features(image, model, style_layers, content_layers):
features = {}
x = image
layer_mapping = {
'0': 'conv1_1',
'5': 'conv2_1',
'10': 'conv3_1',
'19': 'conv4_1',
'21': 'conv4_2',
'28': 'conv5_1'
}
style_feats = ()
content_feats = ()
for name, layer in model._modules.items():
x = layer(x)
if layer_mapping.get(name) in style_layers:
style_feats.append(x)
if layer_mapping.get(name) in content_layers:
content_feats.append(x)
return style_feats, content_feats
def gram_matrix(tensor):
b, c, h, w = tensor.size()
features = tensor.view(c, h * w) # Flatten height and width
G = torch.mm(features, features.t()) # Compute Gram Matrix
return G / (c * h * w) # Normalize
# Get features (layer outputs)
style_feats, _ = get_features(style, vgg, style_layers, ())
_, content_feats = get_features(content, vgg, (), content_layers)
# Calculate style gram matrix
style_grams = (gram_matrix(f) for f in style_feats)
# Pre-set
generated = content.clone().requires_grad_(True).to(device)
optimizer = optim.LBFGS((generated))
mse = nn.MSELoss()
style_weight = 1e6
content_weight = 1
- Prepare a new photo loop
In the following code, we can calculate the total damage at each stage (with the help of the gram matrix between styling vs. damage and with the help of a square error lack of material vs. damage) and can change our produced photo pixels to minimize this total damage.
# General Loop to Create new Picture
run = (0)
num_steps = 500while run(0) <= num_steps:
def run_optim():
optimizer.zero_grad()
style_gen, content_gen = get_features(generated, vgg, style_layers, content_layers)
# Content Loss
content_loss = 0
for gen, target in zip(content_gen, content_feats):
content_loss += mse(gen, target)
# Style Loss
style_loss = 0
for gen, target in zip(style_gen, style_grams):
G = gram_matrix(gen)
style_loss += mse(G, target)
total_loss = style_weight * style_loss + content_weight * content_loss
total_loss.backward()
if run(0) % 5 == 0:
print(f"Step {run(0)}: Content Loss {content_loss.item():.4f} | Style Loss {style_loss.item():.4f}")
run(0) += 1
return total_loss
optimizer.step(run_optim)
image_generated = im_convert(generated)
plt.figure(figsize=(8, 8))
plt.imshow(image_generated)
plt.title("Generated Image")
plt.axis('off')
plt.show(block=False)
image_pil = transforms.ToPILImage()(image_generated)
# Save
image_pil.save("output.jpg")
You can try to change the maximum stages, early losses, start data, layers of selection, correction methods, even a different model, with a different model… all of these systems have many different effects on output.